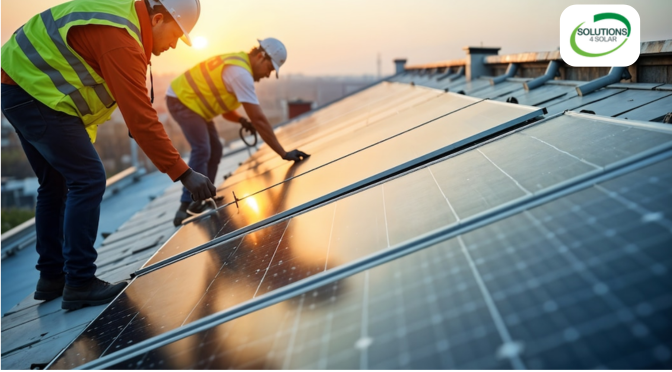
Switching to solar is becoming a popular choice across Australia, especially for families looking to cut electricity bills and enjoy long-term energy independence. But if you’ve never been through the installation process before, it’s natural to wonder what actually happens on the day. Here’s a simple, Australian-friendly breakdown of each step, so you know exactly what to expect when working with Tarneit solar installers or trusted professionals nearby.
Step 1. Initial Home Assessment & Roof Inspection: Your solar journey starts with an on-site inspection. Installers assess your roof’s direction, shading, strength, and available space. This helps them determine the best layout and system size for your home. Whether you’re speaking to solar installers in Truganina or another local team, this step ensures your system delivers strong performance all year round.
Step 2. System Design & Approval: After gathering all the site information, installers design a customised solar layout based on your energy use, roof structure, and preferred components. They also handle all the required approvals, including grid-connection applications. This means the paperwork is taken care of, leaving you with a smooth and stress-free process.
Step 3. Preparing the Site for Installation: On installation day, the crew arrives with safety equipment, tools, and all necessary components. They set up safety rails, clear the workspace, and plan the wiring routes. For homeowners choosing solar unit installation in Tarneit, this preparation step ensures your system integrates safely and efficiently with your existing electrical setup.
Step 4. Mounting the Roof Racking System: The racking system forms the foundation of your solar panels. Installers secure the racking onto your roof with precision, making sure it can withstand tough Aussie weather—from extreme heat to heavy winds. Proper alignment here ensures maximum sunlight exposure and long-term durability.
Step 5. Installing the Solar Panels: Once the racking is in place, the panels are carefully mounted and secured. Installers check spacing, angle, and alignment to make sure each panel performs at its best. Quality workmanship at this step helps your system achieve strong output for decades.
Step 6. Wiring & Inverter Setup: Installers then run electrical wiring from the panels to your inverter and connect the system to your switchboard. The inverter is crucial—it converts the sun’s energy into usable electricity for your home. A professional solar system installation in Truganina ensures all cabling is neat, compliant, and built to Australian safety standards.
Step 7. System Testing & Commissioning: Before the system is switched on, installers run a series of tests to make sure everything is working safely and efficiently. They check voltage levels, confirm the grid connection, and ensure communication between all components. Once approved, your solar system is officially commissioned.
Step 8. Final Handover & Monitoring Setup: To wrap things up, installers guide you through how your new system works. They set up your monitoring app, explain how to read energy production, and provide all warranty and system documentation. Most solar installers in Truganina also offer ongoing support and maintenance tips.
Conclusion
Going solar doesn’t have to be complicated. With the right team, the entire process—from assessment to final handover—is smooth, transparent, and stress-free. Whether you’re working with solar installers in Tarneit, Truganina, or another local expert, you can trust that every step is carried out with care, safety, and professionalism. In the end, you get a reliable solar system built to deliver clean, affordable energy for many years to come.
All you need to do is to opt for Solutions4Solar if you are in Melbourne or any suburb of Melbourne like Tarneit or Truganina, as we are amongst the best. Call us at 1300 499 708 to book an appointment or ask for a free quote. You can also fill up the contact form on our website and submit it. We will reply immediately.
FAQ:
Do I need approval before installing solar panels?
Yes. We organise grid-connection approval and ensure the system meets Australian standards. You generally don’t need council approval unless your home has special restrictions.
Will my roof be damaged during installation?
Our professional installers use proper mounting systems designed for Aussie roofs. When done correctly, there should be no damage, and all penetrations are sealed to prevent leaks.
What size solar system do I need?
The right size depends on your energy usage, roof space, and future plans (like adding a battery or EV). Your installer will recommend a system based on your household needs.
Can solar panels work during cloudy or rainy days?
Yes. Panels still generate electricity in cloudy weather, just at a reduced output. Solar works best in full sunlight but continues producing energy year-round.
Do I need a battery with my solar system?
A battery is optional. It stores excess energy for night-time use, but many Aussie households start with panels only and add a battery later when budget allows.
How long do solar panels last?
Quality solar panels typically last 25 years or more. Inverters usually last 8–12 years and may need replacing once during the system’s lifetime.
What maintenance do solar panels require?
Solar panels need minimal maintenance. A quick clean once or twice a year and a routine system check by our professional is usually enough to keep them performing well.
How soon will I see savings on my electricity bill?
Most households notice savings from the very first bill. The amount depends on your system size, usage habits, and feed-in tariff rate.
Can solar panels be installed on any type of roof?
Most roof types—tile, metal, tin, and concrete—are suitable for solar installation. If your roof is older or damaged, the installer may recommend repairs before installation.
- By: web admin
- Tags: Solar Installers
- 0 comment